
Stoyan (@stoyanstefanov) is a Facebook engineer, former Yahoo!, writer ("JavaScript Patterns", "Object-Oriented JavaScript"), speaker (JSConf, Velocity, Fronteers), toolmaker (Smush.it, YSlow 2.0) and a guitar hero wannabe.
TL;DR: 2% win
Motivation
Lossless image optimization is a no-brainer. Same pixels, smaller files – what’s not to like? More concretely, when talking about JPEG images, a few years ago one study showed 13% win if you run all JPEG images found on the top 1000 sites through the jpegtran tool. But what if you can do a little better? And along the way:
- Change 0 pixel information in all your images
- Change 0 lines of code in your app
Enter…
MozJPEG
The project was announced in May of last year but looks like the github repo has been around for 6 years now. So it was not developed yesterday on a whim. To learn more about the project, a good place to start is Kornel’s last year perf calendar post.
All you need to know is that if you use jpegtran (and it’s a crime if you don’t) in your build process, it’s time to look into upgrading it to the API-compatible MozJPEG version. In other words, all you need to do is install MozJPEG and replace jpegtran. If you want to keep the old one around, you can still do so, but then you need to change one line in your build code. What a drag!
A quick study
Call me old fashioned, but I don’t always accept stuff I read on the web blindly. So I thought I should take mozjpeg for a little spin. I ended up with a little over 900 files and I ran them through identical commands using jpegtran-proper and the mozjpeg’s version. E.g.
cp imgs/1.jpg opts/1-orig.jpg
jpegtran -copy none -optimize -progressive imgs/1.jpg > opts/1-tran.jpg
/usr/local/opt/mozjpeg/bin/jpegtran -copy none -optimize -progressive imgs/1.jpg > opts/1-moz.jpg
TL;DR: 2% win, you can stop reading now, the rest is pretty mundane “here’s how the study was done” kind of stuff.
Installation
On a Mac it can’t be simpler. JPEGTran is already preinstalled and installing MozJPEG with Homebrew is a breeze:
$ brew install mozjpeg
Source material
Since I was spending time hunting Black Friday, Cyber Monday and any-other-day price drops on a few music sites, I thought I should get my source material for the study from there.
I opened a new incognito window in Chrome, popped the Network tab in the Inspector, clicked “Preserve log” and went on with my usual routine of browsing sweetwater.com, guitarcenter.com and vintageking.com, hunting for deals.
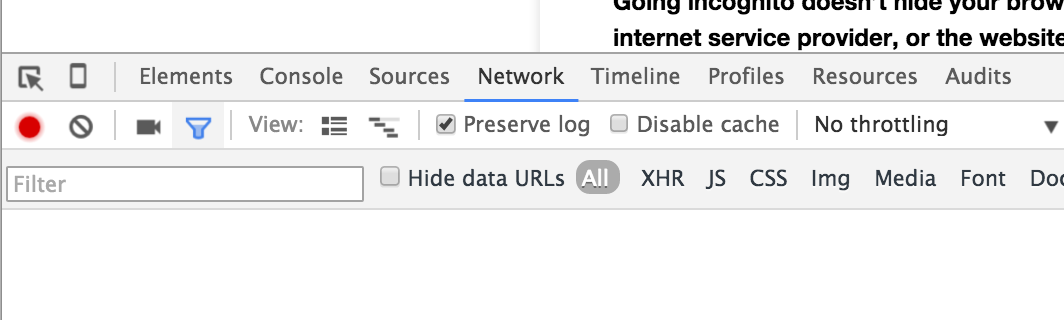
Before I knew it, I had over 1000 entries in the network log matching the “.jpg” filter.
Right-click, “Copy All as HAR”, paste into a new file prefixed with var har = and off we go finding the JPEG URLs. The HAR file is here BTW, if you’re curious.
Loading the har.js into an HTML page lets you quickly and painlessly play with the data right in your console.
var jpegs = {}; // calling all unique the JPEG URLs
har             // all the data
  .log          // the log data
  .entries      // ok, ok, too many comments
  .filter(e => e.response.content.mimeType === 'image/jpeg') // filter out non-jpegs
  .forEach(e => jpegs[e.request.url] = 1); // push to the map of unique URLs
Now since you don’t have the actual images, just their URLs, time to spit out some cURL commands:
var i = 1;

var curls = Object
  .keys(jpegs)
  .map(e => 'curl "' + e + '" > ' + (i++) + '.jpg');

curls.join('\n');
Taking the output of this and pasting to a file like curls.sh, then
$ sh curls.sh
Give it a minute and you have a nice collection of images on your disk, ready to be examined.
First some cleanup of errors in downloads or the sites trying to pass non-jpegs as jpegs:
$ identify -format "%m," *
Imagemagick is perfect for this. If all is fine in the world you’ll see “JPEG,JPEG,…”. If not you can find and delete non-jpegs from the study, e.g. by looking for GIFs
$ identify -format "%m,%f\n" * | grep GIF
Optimizing
Now say all the source images are in /imgs directory and all the results will be in /opts. Time to wipe out a quick nodejs script that will produce another .sh file
Regular requires:
var fs = require('fs');
var path = require('path');

var dir = fs.readdirSync;
var read = fs.readFileSync;
Directory listing:
var p = path.resolve(__dirname, "imgs");
var i = 0;
dir(p).forEach(function(f) {
  // spit out commands here...
});
One more time, this time with the actual spitting out:
dir(p).forEach(function(f) {
  i++;
  var src = 'imgs/' + f;
  console.log('cp ' + src + ' opts/' + i + '-orig.jpg');
  console.log('jpegtran -copy none -optimize -progressive ' + src + ' > opts/' + i + '-tran.jpg');
  console.log('/usr/local/opt/mozjpeg/bin/jpegtran -copy none -optimize -progressive ' + src + ' > opts/' + i + '-moz.jpg');
});
Run like
$ node optimzie.js > opti.sh
Now optimize:
$ sh opti.sh
Now your /opts directory has files like:
1-orig.jpg // original
1-tran.jpg // ran through JPEGTran
1-moz.jpg // ran through MozJPEG's version of JPEGtran
Results!
Another quick nodejs script spits out CSV data that you can then inspect in Excel
var data = [];
var p = path.resolve(__dirname, "opts");
dir(p).forEach(function(f) {
  if (f.indexOf('orig.jpg') === -1) {
    return;
  }
  var id = f.replace('-orig.jpg', '');
  var row = [];
  row.push(id);
  row.push(fs.statSync('opts/' + id + '-orig.jpg')['size']);
  row.push(fs.statSync('opts/' + id + '-tran.jpg')['size']);
  row.push(fs.statSync('opts/' + id + '-moz.jpg')['size']);
  data.push(row.join());
});

console.log(data.join('\n'));
Spittin’ out stats:
$ node stats.js > stats.csv
Both the CSV and the Excel version can be found here.
Analysis
One thing that may look odd when you look at the data is that sometimes JPEGtran increased the file size. This is probably because of the -progressive option and because many of the source files were already optimized. Now, according to this study, the average JPEG is smaller in size using progressive encoding if the file is 10K or larger. That’s why it’s recommended you bruteforce with JPEGTran (try both progressive and baseline encoding and pick the smaller). (I didn’t do it out of laziness. But since this affects only smaller files, I don’t think the slight increase in some small files skews my averages.) The good news is that with MozJPEG you needn’t worry about bruteforcing, as you can see in the data, MozJPEG never produces a larger file than the original.
Some numbers:
- 27,409,049 bytes total in the original 920 files downloaded off the sites
- 25,923,493 bytes after running through JPEGTran or 94.58%, so 5.42% savings. This is less than the 13% from the original study, but hey, different times, different source sites, smarter developers
- 25,447,748 total bytes after running though MozJPEG or 92.84% so 7.16% savings
- Median results with JPEGtran – 97.56% of the original
- Median results with MozJPEG – 95.71% of the original
Conclusion
Switch to MozJPEG today. It’s a simple install and 1 (or 0, or maybe -5 if you delete the -progressive bruteforce) lines of code change in your build script and 0 changes in the application code.
You can say that, based on this limited study of a sample of 920 images form music gear-selling websites:
- MozJPEG with make the total size of the all the images on your site 1.74% smaller compared to JPEGTran.
- MozJPEG will perform 1.85% better than JPEGTran on any old median run (the average is 3.46% btw)